Tuesday, December 17, 2013

Reindeer Tag

Happy Wednesday!  I wanted to share another tag I made. I used the same design and similar colors as the post from yesterday but thought I would go ahead and share. 


The tag was cut using Tim Holtz' Bookplate and Tag die.  I painted the cardstock using Martha Stewart's acrylic paint in sea glass. 


The reindeer and sheet music were both cut from Sizzix dies.  Enjoy!

Supplies:  
Tim Holtz Bookplate and Tag Die
Tim Holtz Reindeer Die
Tim Holtz Jump Rings
Tim Holtz Trinket Pin
Tim Holtz Crinkle Ribbon
Tim Holtz Distress Ink in Tumbled Glass
Tim Holtz Distress Stain in Brushed Pewter
Sizzix Sheet Music Die
Martha Stewart Acrylic Paint in Sea Glass
Martha Stewart Glitter in White Gold
Metallic Card Stock
Bead
Tinsel Ribbon
Silver Fun Fur
Silver Ribbon
Hot Glue
Pop Up Adhesives

Snowflake Rosette Tag

Hi!  I don't know about you but I am so behind on making Christmas tags this year.  I have a pile of presents waiting to be tagged! 

Below is a quick tag I made using Tim Holtz' Snowflake Rosette Die.  I cut it out from Kraft paper and then covered it with TH distress stain in Platinum.  I love how the color turned out.


The tag was painted using two coats of  Martha Stewart acrylic paint in 'Sea Glass.'  I dyed the bow with distress inks to match.  I added a little fun fur and 'tinsel' ribbon for variety.  I purchased the bead from the jewelry department at Michael's and attached using a Tim Holtz decorative safety pin and rings.


The music notes were cut on digital paper from Crafty Secrets.  Initially, the paper was red and white sheet music but I altered it to turn it black and white.  I then colored with various distress inks.  Glossy accents were applied to adhere and to add a bit of shine.

Thanks for looking!

Supplies:
Tim Holtz Snowflake Rossette
Sizzix Sizzlits Decorate Strip Die-Sheet Music
Tim Holtz Distress Ink in Vintage Photo
Tim Holtz Distress Ink in Tumbled Glass
Tim Holtz Distress Stain in Brushed Pewter
Tim Holtz Metal Trinket Pin
Tim Holtz Crinkle Ribbon
Tim Holtz Metal Jump Ribbon
Ranger Glossy Accents
Martha Stewart Acrylic Paint in Sea Glass
Crafty Secrets Creating with Vintage Christmas Digital Download
Fun Fur
Tinsel Ribbon
Silver Ribbon
Bead
Hot Glue
Button

Sunday, December 15, 2013

Crafty Secrets Santa Paper

Happy Sunday!

Here's a quick little Christmas card I made today. I love this Santa paper from 
the Crafty Secrets creating with Vintage Christmas Digital Download and wanted to showcase the Santa images which is why I didn't add a ton of embellishments to this one. 


I inked the edges with vintage photo distress ink before adhering to gold cardstock. I purchased the 'Merry Christmas' ribbon at Hobby Lobby last year and the snowflake was cut from a Tim Holtz die. The tiny mirrored snowflake was cut from a Recollection's punch. 

Thanks for stopping by!

Supplies used:
Tim Holtz Vintage Photo Distress Ink
Tim Holtz Snowflake Rosette
Metallic gold and Mirrored cardstock 
Recollections Tiny Snowflake Punch
Hot Glue
Glossy Accents Adhesive


Thursday, December 12, 2013

Addison's Pink Village Part 1

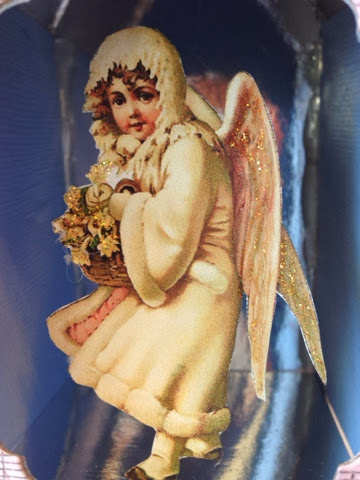
Hi, there!  I wanted to share a sweet little something my daughter has been begging for...a pink Christmas village! She's in awe of my Dicken's village but pretty insistent that we get a pink house (bear in mind, she just turned three). So, I decided to to give her a pink village this year. 


I cut the house using Tim Holtz' Artful Dwellings die. The cutout for the angel was made using a Spellbinders die. 


The paper was from Crafty Secrets' Creating with Retro Christmas Download. Initially, the  sheet music was red but I edited it to black before inking with spun sugar distress ink.

The roof was glittered and beaded with a string of faux pink pearls.  My daughter wanted to add a 'jewel' to make more 'sparklies'. 


I 'mirrored' the inside of the house using metallic cardstock. The angel inside is from the CS Creating with Vintage Christmas Download. I cut it out and added Stickles to her flowers and wings.  


Of course my daughter just had to put it with my village so here it is...placed alongside mine. It doesn't look out of place at all :)

Supplies:  
Tim Holtz Artful Dwellings Die
Tim Holtz Distress Ink Pad in Spun Sugar
Tim Holtz Grunge Board
Ranger Stickles 
Martha Stewart Glitter
Faux pearls and jewel
Metallic Cardstock
Hot Glue


Sunday, December 8, 2013

Crafty Secrets Retro Christmas Pyramid Box

Hi, I hope everyone had a wonderful weekend!.

Here is another project I created for the Crafty Secret's December Linky party.  This little ornament was made using a template from the Crafty Secrets Creating with Retro Christmas Download. I promise, the pictures don't do the images justice...I am a terrible photographer!


My son asked for an outdated game for his handheld device and only used ones were reasonably priced so the one I ordered came without a case. Needless to say, the games are tiny and I had the pleasure of learning the hard way that I cannot keep anything 'bagged' under our Christmas tree because my toddler believes those kinds of packages are fair game. So, I wanted to create a gift holder she couldn't get into!


This was so simple to make. Simply cut and score the template and adhere a few sides together and you have the cutest little Christmas pyramid. I hot glued a little ribbon, holly, and a couple of jingle bells and there you have it! Makes a darling little ornament and in my case, a gift box!

Thanks so much for looking!

Supplies:
Crafty Secrets Creating with Retro Christmas Download
 Martha Stewart Holly Punch
Jingle Bells
Glossy Accents
Ribbon

Wednesday, December 4, 2013

Believe

Happy Wednesday!

Here's another project I created for the Crafty Secrets December Linky Party.  I am in the process of making holiday tags for everyone and I am beginning to think I should have started sooner! 

I wanted to incorporate some of Tim Holtz' facets into this tag so I used so I used some vintage images from the CS Creating with Vintage Christmas Download.  These little guys are from a selection of papers they offer in the kit.  The music background paper is from the same kit, as well.


I adhered the images to the facets using Glossy accents and cut them to fit with an exacto knife after they dried. 

The letters were cut from Tim Holtz' wanted die that I purchased on clearance for $6.00 at Joanne's yesterday.  Don't you love it when you can find dies on clearance?  I do!  I coated them with glossy accents and used a gold Krylon pen on the edges.


The facets were hung from brown and white baker's twine using tiny gold brackets. 


Here's a close up of the tag.  The photo doesn't show it well but I used a 'cracked glass' technique I learned from the blog of of the very talented members of the CS design team.  Her name is Kathy Clement and you can find her tutorial here.

That's all for now.  Hope you enjoy!

Supplies:
CS Vintage Christmas Download Kit
Tim Holtz Facets
Tim Holtz Vintage Photo Distress Ink
Tim Holtz Wanted Die
Tim Holtz Bookplate and Tag Die
Ranger UTEE
Krylon Gold Pen
Martha Stewart Baker Twine
Glossy Accents
Brads
Hole Punch


Monday, December 2, 2013

Essence of Christmas

Hi, All. I hope everyone had a wonderful Thanksgiving.

I have to post and run but I wanted to share a quick card I made for the December Crafty Secrets Linky Party.  Can you believe December is already upon us? 


I wanted to stray from the traditional reds and greens for Christmas.  Not that I don't love those colors but I was in the mood for something a little different.

I used the CS Creating with Vintage Christmas Download to print the Santa image before inking with distress ink.  After cutting out, I adhered it to gold card stock cut from Spellbinders' Lacey Oval die.  Next, I applied 'pearls' with my Viva Pearl Pen.  I can't believe I went so long without one of these...much less time consuming than using faux pearls.


I cut the flowers from Spellbinders' poinsettia die and inked them with a little vintage photo.  The corners were punched with a Fiskars punch.  

That's all for now. I hope you enjoy!

Supplies:
CS Vintage Christmas Download
Gold Card Stock
Viva Pearl Pen
Tim Holtz Vintage Photo Distress Ink
Spellbinders Poinsettia Die
Spellbinders Lacey Oval Die
Lace Ribbon
Adhesive
Fiskars Romantique Corner Punch


Thursday, November 21, 2013

Vintage Santa Card

Hi!

I hope everyone is having a good week. I have been incredibly busy at work lately and am so happy I stopped to take a moment for myself and craft. 

Today, I want to share a card I created using various papers and an image from Crafty Secrets. They really do offer some of the most beautiful vintage items!


The Santa image is from the CS Vintage digital download. Don't you just love this guy? 

The papers are from the CS Radiant Paper Collection digital download. I made the poinsettia using a favorite Spellbinders die. My husband argued it looked better without the flower but I told him it was just too easy otherwise and who doesn't love flowers?


For the inside of the card, I chose an image from the CS Vintage Christmas download and resized it to fit. So simple! 

Thanks so much for looking!

Supplies:
Crafty Secrets Vintage Christmas Digital Download
Crafty Secrets Radiant Paper Collection
Spellbinders Poinsettia Die
Tim Holtz Vintage Photo Distress Ink
Ranger Glossy Accents
Ribbon


Sunday, October 13, 2013

Retro Christmas Ornaments

Hi!  Hope everyone is having a good weekend. I thought I would share a quick project I put together for the Crafty Secrets Linky Party this month. 


These were so simple to put together but I think they will sparkle so pretty on our Christmas tree this year!


The images are from the Crafty Secrets Retro Christmas download which can be found here.  I purchased the plaster ornaments from Michael's for a little over a $1.00 a piece.


I used Martha Stewart Glitter to make the ornament shine and used glossy accents on various parts of the images.

Enjoy!

Supplies:
Crafty Secrets Retro Christmas Digital Download
Martha Stewart Glitter in White Gold (my favorite)
Martha Stewart Glitter Glue
Michaels plaster ornament
Ranger Glossy Accents

Friday, October 11, 2013

Halloween Box

Hi, All. I am so glad it's Friday!

Here's another project I am submitting for the Crafty Secrets October Linky Party.  I am thinking I might take the lid off and display a few faux black roses. 


I found this unfinished box at Walmart in the kids craft section for $3.00. 


I used a black paint dabber to first color the edges of the box. 


While that dried, I sized and printed off images from the CS Halloween Jumbo digital download kit. Love this kit. It also is available in CD form if you prefer it to the instant download they offer. 


After printing, I cut the images and used Glue 'n' seal to adhere. 


I tried to capture the star cutout on the top of the box but couldn't get a great image. The lid if the box had a star shape cutout with a picture frame type closure on the inside of the lid. I printed off a cute little spider from the kit and inserted as my 'picture.'  

Thanks for looking. Can't wait to see your creations for the CS Linky Party!

Supplies:
CS Jumbo Halloween Download Kit
Tim Holtz Paint Dabber in Black Soot
Ranger Glue 'n' Seal
Wooden Box
 

Thursday, October 10, 2013

Crafty Secrets October Linky Party


Hi! It's time for the Crafty Secrets Linky Party once again! I can't wait to see everyone's submissions. I am always in awe of the talent that all of you possess!

This month I created a few Halloween plaques to hang for decorations. These were so simple to make but messy! I have glitter all over the house. My toddler thinks it's great of course, and thinks we should add 'sparklies' everywhere!


All of these adorable images come included in the CS Halloween postcard kit. PS-there are MORE images included than what I am sharing here today!


I cut the images and chipboard using a Spellbinders die. After adhering the image to chipboard, I sealed with Glue 'n' Seal.


For the larger chipboard, I used orange and black paint dabbers around the edges before I glittered.  I always try to do this before glittering in the event some of the glitter doesn't stick...I don't want a big brown gaping hole showing on my projects!


After the glitter dried, I hot glued everything together and added a simple bow. 


Thanks for looking. I can't wait to see your project in the CS October Linky Party!

Supplies:
Spellbinders Dies
Chipboard (in this case, a good ole Pop-Tart box)
Tim Holtz Paint Dabbers in Rusty Hinge and Black Soot
Martha Stewart Glitter 
Ranger Glue 'N' Seal
Hot Glue Gun & Glue
Orange Sheer Ribbon


Sunday, September 15, 2013

Halloween Village Part 4

Happy Sunday! Hope everyone is enjoying their weekend. 

I wanted to share a little Halloween house I decorated yesterday. I saw this paper mâché house at Joann's and couldn't resist. 


The walls were decorated in Viva black crackle paint and slightly distressed with a new favorite of mine...Viva Inka Gold Metallic Rub in Haematite. Love this stuff!


I coated the entire roof and the base in the Viva rub, as well, and then used a paint dabber to give the roof some dimension. 


I cut up some old spellbinders plastic packaging and died it with alcohol ink to create the windows. I outlined each of he windows in Stickles for the final touch. 

Enjoy!

Wednesday, September 4, 2013

Happy Owl-oween

Hello.  Here's a quick little card I put together.  I see owls everywhere in the stores these days.  I think they're so cute!

The owl image, the black and white checkered paper, and the background paper are all from the Crafty Secrets Halloween Jumbo Kit.  I plan to enter this card in their September Linky party.  All contestants will receive a $6.00 gift card to their online store and one lucky winner will earn $50.00.  It's fun to see so many talented individuals.


The Spellbinders 'Daisy Heads' die was used to make the peonies.  The picture doesn't show it well but black soot Stickles outline each of the papers. 

Thanks for looking!

Supplies:
Crafty Secrets Halloween Jumbo Kit
CS Halloween Fun Stamp Set
Tim Holtz Black Soot Stickles
TH Tiny Tags Die
TH Vintage Photo Distress Ink
Spellbinder's Daisy Head Dies
Ribbon
Baker's Twine

Tuesday, September 3, 2013

Halloween Advent Calendar

Happy Labor Day!  Hope everyone got to enjoy a long weekend. I wanted to share a project I created for the Crafty Secrets September Linky Party.  I decided to make a Halloween Advent Calendar for the kiddos to enjoy this fall.


The orange star paper is from the Crafty Secrets Jumbo Halloween Kit.  I simply cut the squares out using an old Sizzix die and adhered them to a piece of black craft foam poster board that I purchased at Walmart for around $1.50.  The wooden dowel was purchased from Michaels and colored with black glimmer mist. 

I stamped the numbers using clear embossing ink and covered with black embossing powder to make the numbers.  Most of the images are from various Crafty Secrets stamp sets or from their Halloween sticker collection.  They were tweaked using glossy accents.  I decided to use an owl for the 'countdown' portion (shown on box no.7) that I printed from the CS Halloween digital download.  The owl was actually sized at a full page and I shrunk it down to less than 1inch.  Got to love the versatility of digital!

I used a standard computer font to print off the words 'Happy Halloween' before covering them in glitter.


The kids on the 31st are from the CS Costume Cuties stamp set. This is my absolute favorite CS set and the very first CS product I purchased. I bought it from a seller on eBay, I believe, before I ever knew about CS.  Upon purchasing, I started looking for similar vintage stamp sets and that's how I found CS!  I will always have a special place in my heart for this set!

I punched out our last name using a Martha Stewart punch and glossed it up with glossy accents, too. 

Thanks for looking.  Hope you enjoy!

Supplies:
Crafty Secrets Vintage Halloween Jumbo Kit
CS Costume Cuties Stamp Set
CS Halloween Postcard Stamp Set
CS Halloween Fun Stamp Set
CS Halloween Time Heartwarming Vintage Stickers
7 Gypsies Numero Stamp Set
Tim Holtz Vintage Photo Distress Ink
TH Glossy Accents
Hot Glue
Tattered Angels Black Glimmer Mist
Ribbon
Martha Stewart Heat Tool (to set embossing powder)
MS Glitter
Black Embossing Powder
Wooden Dowel
Sizzix Square Combo Red Die


Saturday, August 24, 2013

Yes to Carrots!

Happy Saturday!

Today I made a card using Crafty Secrets Digital Vegetable Garden Stamp set. 

I printed the image onto watercolor paper and colored with my new Inktense Pencils.  After distressing the edges in vintage photo, I adhered to kraft paper lined with Stickles.  So simple!


Enjoy!

Supplies:
Crafty Secrets digital Vegetable Garden Stamps
Tim Holtz Vintage Photo Distress Ink
Tim Holtz Vintage Photo Stickles
Derwent Inktense Pencils
Ribbon
Button
Brown and White Baker's Twine

Sunday, August 18, 2013

Thinking of You

Hi, Everyone. 

So excited today! I just purchased Dewent's Inktense Watercolor Pencils (after much hesitation due to price) and I must say, I am pleased! In the past, I have stayed away from blending markers as I just wasn't experienced in that area and after a few failed attempts, I gave up; however, I think colored pencils are about the easiest things to color with so I gave these a shot. 

I printed the image from Crafty Secrets' CD1 onto watercolor paper. 


I only used three colored pencils for the entire project. One pink and two different greens. After coloring, I used a waterbrush to go over the colors. You could just as easily use a paintbrush but for me, the thickness of the waterbrush is easier to control. 


I used tea dye distress ink to age the image and after adhering to colored cardstock, went around the edges with vintage photo Stickles. 

That's all!  Thanks for looking!


Wednesday, August 14, 2013

Halloween Postcard

Greetings!  Just wanted to share a quick project I put together.  I apologize ahead of time for using my bulletin board as a backdrop but I am crunched for time today and didn't want to fuss with having to hang something.

The postcard below is from Crafty Secrets (of course).  These are super easy to put together and are a great little pieces to add to your fall decor.

The postcard kits are available with/without chipboard...I ordered mine without as I own the Spellbinders die that would cut out the shape.  I also didn't purchase the chipboard as I have found cereal boxes work just fine and we have plenty in our home!


I inked the edges using Tim Holtz vintage photo distress ink and then adhered the image to the 'cereal board.'

I adhered ivory paper to the backside and used the included Halloween stamps to decorate.  Yes, I said 'included.'  Along with 56 images, the Crafty Secrets kit includes a small stamp set to add to your collection.  The entire kit creates up to 18 postcards.

I finished the mini project by inking the back with more vintage photo and hung with jewelry wire, beads, and polished it off with a bow. 


Enjoy!

Supplies:
 Crafty Secrets Halloween 54 Piece Images and Mini Clear Art Stamp Set
Tim Holtz Vintage Photo Distress Ink
TH Antique Linen (stars around border)
Ranger Glue n' Seal
Ranger Archival Black Ink
Jewelry Wire
Beads
Ribbon
Spellbinders Labels Four

Monday, August 12, 2013

Halloween Greetings

Hi Everyone,

I thought I would share a tag I created using Tim Holtz' rickety house die. I am so ready for Halloween.  I've noticed some of the craft stores stocking up and it just adds to the anticipation!  Don't you just love working with Fall colors?


The background paper is from Crafty Secrets' Vintage Halloween Jumbo Kit. I inked it up with various distress inks from Tim Holtz.

The house was cut from grungeboard and then embossed using a notebook style embossing folder. I then cut the grunge board in between the 'wide-ruled' lines  down the entire length of the house and glued the pieces onto a piece of black card stock that had been cut with the rickety house die. Tim Holtz provides a great tutorial on his site using the rickety house die to create a winter scene (I didn't follow his directions exactly as I didn't have all of the suggested supplies).  After that, I inked up the grungeboard with black soot.

The moon, bat, and image of the kids peeking through the window are from Crafty Secrets' Halloween Time Heartwarming Vintage Sticker Collection.  Love this set!  There are so many great images to choose from.

I used a embossing folder to create the fence and then cut it out using an Exacto knife.  I added a pumpkin button and faux grass for a little embellishment.

Thanks for looking!

Supplies:
Crafty Secrets Halloween Time Heart Warming Vintage Stickers
Crafty Secrets Vintage Halloween Jumbo Kit
Tim Holtz Black Soot Distress Ink
TH Dusty Concord Distress Ink
TH Peeled Paint Distress Ink
TH Rusty Hinge Distress Ink
TH Glossy Accents
TH Rickety House Die
TH Thankful Background & Borders
TH Grungeboard


Sunday, August 11, 2013

Halloween Village Part 3

Hello! I hope everyone had a fabulous weekend!
I want to share the third installment of my Halloween Village.  Click the links to view Part 1 and
Part 2.

This has been such a fun project to make! I really wanted to do a gingerbread house to add a few frills. 


The paper is from Crafty Secrets Vintage Halloween Jumbo Kit.  I love how unique the little 'beaded' spider webs are...too cute!

The fence was cut from Tim Holtz' 'On the Fence' die.  I have used this die for so many things. After cutting, I covered it in black onyx glitter.

The 'frills' were cut from Martha Stewart's vintage floral punch and covered in black onyx glitter, as well.  Now after uploading this photo, I am thinking I might need to add frills around the entire rooftop.  What do you think?

That's all for now.

P.S.  This project will be entered into the Crafty Secrets August Linky Party.  Don't forget to enter...everyone is a winner!

Goodnight and God Bless!

Wednesday, August 7, 2013

Halloween Village Part 2

Good morning! I mentioned in yesterday's post that I have been working on several items to create a Halloween village so I thought I would share another completed piece.  Click here for part 1.

I purchased the house at Hobby Lobby a few months ago and intended to use it for a Christmas village but decided to go another route.

It was really simple to make...mostly just time consuming with having to cut all of the windows and wait for things to dry (I am impatient in this area). 

I papered the house using paper printed  from the Crafty Secrets Vintage Halloween Jumbo Kit. This is available for instant download or can be purchased in CD format.  The little witch is from the CS Heartwarming Vintage sticker collection.

The roof and base were painted using one coat of Tim Holtz' black soot crackle paint. I really like how it turned out. 

I used another paper from the CS Halloween download for the floor. I LOVE this paper! What's cuter than a checkered Halloween floor?  Please forgive the inside walls as I folded the wallpaper in to provide a smoother effect rather than me hacking at the windows with an Exacto knife. I am not the steadiest hand. :)

Everything was glued down using Ranger's Glue n' Seal. Fantastic stuff!
It doesn't bubble like some other glues I have tried so you always have a nice flat surface. It also seals so it's great when u want to protect an image or just give it am extra little stiffness.
Stay tuned! More Halloween village pieces to come!

Don't forget to enter your project for the Crafty Secrets August Linky Party!  It's a great opportunity to see some very talented and crafty projects and everyone who enters wins a gift card to their online store!

Supplies:
Crafty Secrets Halloween Time Heartwarming Vintage Stickers
Crafty Secrets Halloween Jumbo Digital Download Kit
Ranger Glue n' Seal
Tim Holtz Black Soot Crackle Paint